Discover legacy content from FontShop.com, preserved for your reference.
There are quite a few quality stamped or distressed fonts available — Frankie and Frankie Dos, Roadkill, Battery Park, Hawksmoor, Chase, Coldharbour, Despatxada, FF Stamp Gothic, FF Confidential, FF Bull, Elephantmen to name but a few. Unfortunately ready-made stamp fonts present a number of drawbacks: repeating characters are identical (unless you have alternate glyphs), and the amount of detail is limited due to restrictions in the possible number of Bézier anchor points per glyph. To remedy this I developed a trick in Adobe Photoshop for distressing type. This technique allows you to apply a convincing stamped or weathered look to any typeface.
Create whatever type composition you need in Adobe Illustrator or directly in Photoshop. Just remember to keep the resolution fairly low, because we’re going to need pixel texture halfway through. I created this example in Illustrator using Tasse Black Extended at 96pt/72pt and opened it in Photoshop as a grayscale image at 72 ppi.

Select the black type areas with the magic wand or by using an alpha channel based on your composition. (Duplicate channel…: Black: invert -> Select…: Load selection: Black copy: new selection) This prevents you from mucking up the white background.
Apply a High Pass to "eat away" the insides of the characters (Filter: Other: High Pass…) Play a bit with the slider: for the example I set the Radius to 10 pixels and applied it twice.


Apply a fair amount of Gaussian noise to achieve the "grainy" texture. (Filter: Noise: Add Noise…: Gaussian) For the example the slider was set to an amount of 15.

Deselect.
Increase the resolution by resampling. (Image: Image size…: resample image) I doubled the resolution from 72ppi to 144ppi.
Diffuse the image to mask remaining bitmapping of the character shapes (Filter: Stylize: Diffuse…).
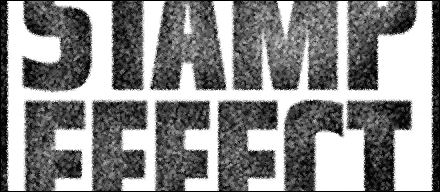
Increase to the desired resolution by resampling. (Image: Image size…: resample image) I doubled the resolution from 144ppi to 288ppi.
Apply a Gaussian blur of 1 pixel to remove the tiny pixels created by the Diffuse filter. (Filter: Blur: Gaussian Blur…)
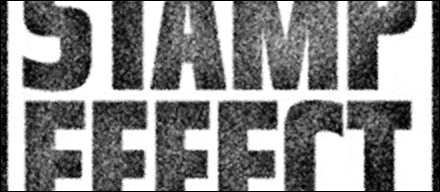
Increase the Brightness and Contrast until you reach the desired amount of “inking”. (Image: Adjustments: Brightness/Contrast…) I set both sliders to +50. As the High Pass filter we applied at the very beginning primarily affects areas with substantial volume, I did a partial selection of the border and applied a higher amount of contrast (+75) to bring out more noise.

Threshold the image to prepare for conversion to a bitmap image. Here you can also play a bit with the slider until you reach the desired amount of “inking”. (Image: Adjustments: Treshold…) I set the slider at 96.

Here’s what it looks like from up close: the effect is perfectly random.
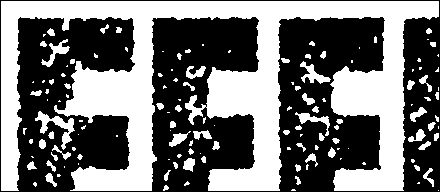
Convert to a bitmap image (Image: Mode: Bitmap…: 50% treshold), save as TIFF and import in your lay-out software of choice. You now have a compact sized graphic with transparent background that can be coloured and overlaid on any element in your design. Et voilà, you’ve just used $3,000 worth of computer equipment to emulate the look of a $3 rubber stamp.
The beauty of this technique is that at every step you can vary the settings, thus achieving different textures, and different amounts of wearing and inking. Remember that the initial resolution of the Photoshop type composition is crucial in relation to the crudeness of the end result, so experiment a lot until you get the desired result. Have fun.
Source: recovered from FontFeed